
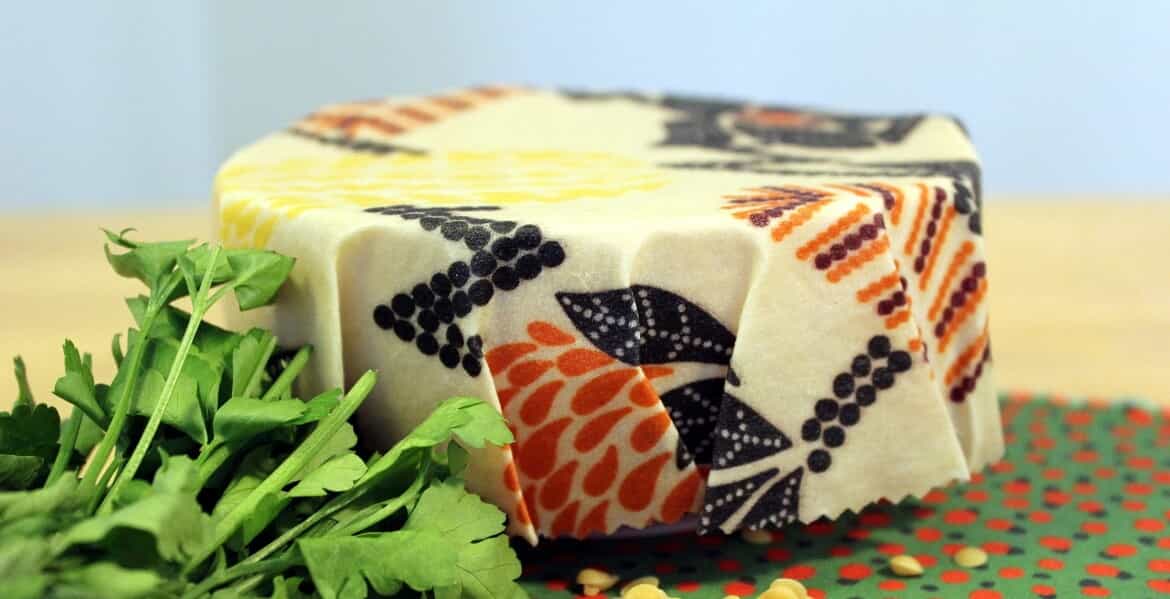
Beeswax wraps are a very practical and popular alternative to plastic wraps for a variety of uses in the kitchen.
Although you can buy a wide variety of colours and sizes of beeswax wraps, it can be a lot of fun to make your own. Plus if you like to sew or craft, it is a great way to use up leftover fabrics!
I started making beeswax wraps myself some time ago and love them for wrapping sandwiches and rolls or other bakery items, fruit, etc and for covering bowls and plates in the fridge instead of plastic wrap. You can use them over and over again, making them very economical and sustainable. And if you choose colourful fabric, they also look really cute!
Now there are an awful lot of websites with different methods of making beeswax wraps. I’ve read a lot of them and tried out a number of different methods. And made a LOT of mess in the process! But after trying a lot of different techniques, what I am going to share with you is what I have found through trial and error to be the easiest method. (And I have included a few extra tips to help reduce the mess!)
What you will need –
- Cotton fabric
- 100g Beeswax
- 30ml Jojoba Oil
(By all means increase or reduce the amount of ingredients you use depending on the number of wraps you want to make. But keep the proportions the same.)
You will also need
- a double boiler (or a heatproof bowl over a pan of hot water),
- a spoon or other utensil
- scales and a measuring jug to measure your ingredients (Although if you buy your beeswax in 100g blocks this makes measuring super-easy!),
- baking paper,
- an iron
- sheets/blankets or newspaper to protect surfaces.
Now a tip. Beeswax when it hardens is very difficult to remove from items, so consider using old utensils that you are happy to only use for this purpose. You can keep them to use again of course. I also keep the baking paper to reuse next time. And do cover all surfaces with layers of newspaper, old sheets etc. Otherwise, expect to spend quite a bit of time on clean up!
Method
- Melt your beeswax in your double boiler, or bowl over simmering water. Then add your jojoba oil and mix together.
- Cut your fabric to size. You can make different sizes, but do consider what you want to wrap (or cover) when deciding how big or small you want your wraps to be. Be wary of trying to work with very large wraps as these can be a little awkward to deal with. Especially for your first attempt!
- Place a piece of fabric on some baking paper on a protected surface. (Make sure the paper extends beyond the edges of the fabric. Use more than one sheet if necessary.)
- Drizzle the fabric with the combined wax and oil mixture. Don’t worry about covering the fabric completely as you will be spreading it in the next step. Just make sure the wax is fairly evenly distributed.
- Cover with another sheet of baking paper. Again make sure to cover the fabric completely with paper.
- Place the paper/fabric/paper “sandwich” on a heat proof surface that you have covered with a protective cloth or newspaper. (You can use your ironing board or a bench or table if suitable. But do make sure to cover and protect the surface very well to avoid covering it with wax. ( Don’t ask me how I know this!) I use a couple of old sheets folded a few of times (so it is thick). I keep these just for this purpose so I don’t have to worry about getting the wax out.
- The wax will have started to harden at this stage. So now use a warm iron over the top sheet of paper to remelt the wax and spread it over the whole area of the fabric. Take your time and work out from the middle to the edges to make sure the wax is even. Watch out if you have put too much wax on the fabric as it will ooze out beyond the edges of the fabric, and even potentially past the edges of the paper. (Which is why you need good protection on your working surface.)
- Peel back the top paper. Lift up the wrap off the bottom paper and hold vertically for a few seconds to allow the wax to start to set. (You can gently wave it back and forward to speed this up a bit.) This will take only a few second to set, although the fabric will still feel warm. Then lay down or hang up your wrap to cool and set fully.
- Repeat these steps with the next piece of fabric.
And that’s it!
Now for some general tips –
- Do use cotton fabric for your wraps. As well as being a natural fibre, cotton will stand up to the heat of the wax and the iron. Don’t use synthetic fabrics such as polyester, as these may melt or otherwise be damaged by the heat.
- You can cut your fabric with either regular scissors (for a straight edge) or use pinking shears for a zigzag edge. (I like to use pinking shears as I think it gives a neater finish and the fabric tends to fray less.)
- To use the finished wraps, wrap or cover the item and use the heat of your hands to gently bend the wrap to fit closely.
- To clean the wraps, rinse with cool or only slightly warm water. Very warm or hot water will cause the wax to melt.
- For this reason, avoid using your wraps for foods that require hot water to clean them, such as meat, dairy products, cheeses etc.
- If your wraps start to look a little rough you can “refresh” them by laying them between 2 sheets of baking paper and re-ironing them.
Beeswax wraps are a reusable, washable and sustainable alternative to single-use plastic and cling wrap.

